Don’t know NordVPN Windows 11 setup for PC? Know 4 simple ways for how to add NordVPN to Windows 11 PC without any hassle.
If you have Windows 11 installed on your PC, you must need software to protect your privacy while using the internet. By setting up Nord VPN for Windows 11 PC, you can secure critical documents from cybercriminals.
It is very easy to install and setup NordVPN on Windows 11 PC. If you follow the Nord VPN Windows 11 configuration guide shared in this article, you can setup NordVPN for Windows 11 easily.
Why Add NordVPN To Windows 11 PC?
Here is the reason to install NordVPN on Windows 11 PC:
- For secure connection on Public Wi-Fi.
- To hide browsing logs from Internet Service Provider(ISP).
- Maintain data privacy while using random apps and services on Windows PC.
- For securing your data from being shared with government agencies.
- Access geo-blocked content on your Windows 11 browser.
- Create a secure connection when remotely accessing the company network from Windows 11 PC.
- Protect multiple devices from becoming prey to cyber crimes.
- Smooth gaming experience on Windows PC with low-ping connection to avoid lag issues.
- Uninterrupted streaming on all platforms without any buffering issues.
- Change your location virtually on Windows 11 PC.
These are the main benefits that tell why you need VPN. So using NordVPN for Windows 11 will help in the conditions mentioned above for securing your personal data from hackers. That’s why NordVPN Windows 11 setup is important if you want to share files safely on remote networks. You can also use NordVPN on Chromebook Windows 11.
How To Add NordVPN To Windows 11 PC?
If you don’t know how to install and setup NordVPN on Windows 11 PC then you should know these 4 ways:
- Manual NordVPN Windows 11 Setup From PC Setting.
- Configure NordVPN For Windows 11 PC via Network & Sharing Center.
- Setup Nord VPN Windows 11 PC Client From Microsoft Store.
- Install NordVPN On Windows 11 PC via Official Website.
Read below if you want to understand how to install Nord VPN for Windows 11 PC using these methods. We have shared the complete guide so you can easily configure NordVPN on your Windows 11 PC.
Method 1: Manual NordVPN Windows 11 Setup From PC Setting
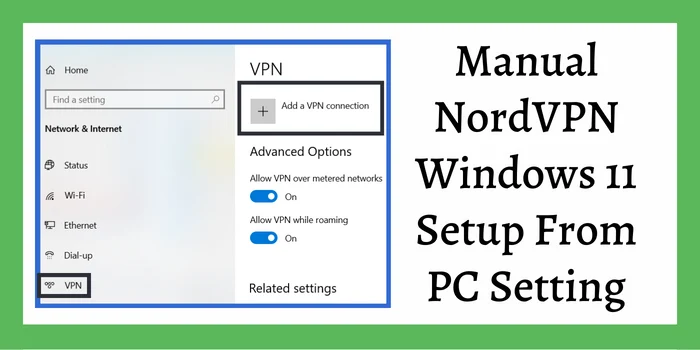
Follow these steps to install NordVPN on Windows 11 PC.
Create Account NordVPN For Windows 11 PC:
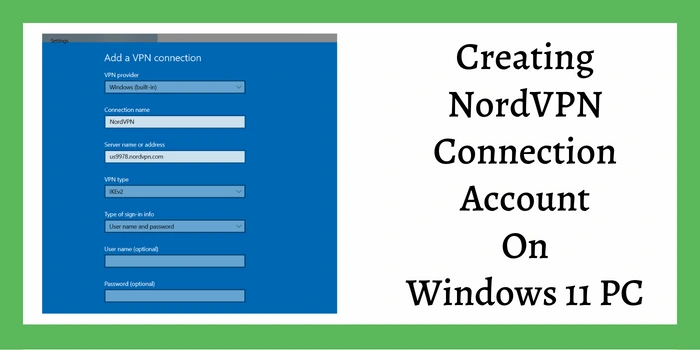
- Buy a NordVPN subscription(try NordVPN 1 year discount code).
- Open “Network & Internet” settings.
- Then click on the “Add VPN” button.
- Now a pop will appear to fill in the VPN details.
- In the VPN Provider section, choose “Windows(built-in)”.
- Write “NordVPN” in the connection name.
- Login to NordVPN’s official website and go to Dashboard.
- Then visit the NordVPN server page and choose a server.
- Copy the server address and server IP from there.
- Paste them in VPN details under “Server name & Address”.
- After that, select a VPN protocol(IKEv2 preferred).
- Put Username & Password and that’s it.
Add NordVPN Windows 11 PC Certificate For IKEv2:
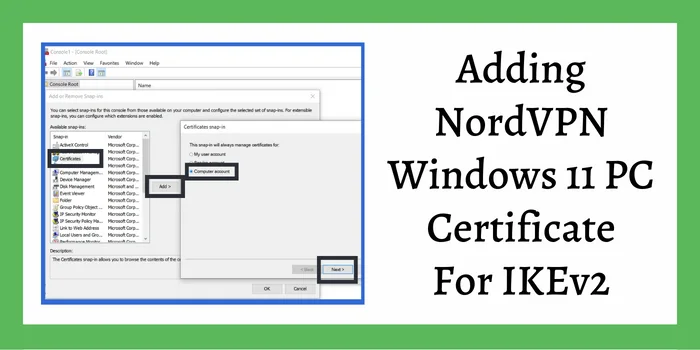
- Download NordVPN IKEv2 certificate.
- Press the Windows+R key from your keyboard.
- Write “MMC” and open the Microsoft Management Console.
- Select “Add/Remove Snap-in” from the “File” menu.
- Then select “Certificates” and tap on the “Add” button.
- Choose “Computer account” in the next window.
- Now click on “Next”, then click the “Finish” button.
- Then click on “OK” in Add/Remove Snap-in window.
- Open the “Certificate” shown in the left panel.
- Click on Trusted Root Certification Authorities.
- Then right-click on the “Certificates” folder.
- Now tap on “Import” under the “All Task” tab.
- A pop-up will appear and click “Next” on it.
- Browse the folders for the right certificate file and choose it.
- Make your own password and tap “Next”.
- Now click the “Finish” button.
- A pop-up will appear for a successful import, click the “OK” button.
- Finally, click “Save” to install NordVPN on Windows 11 PC.
Configure Network Properties To Add NordVPN To Windows 11 PC:
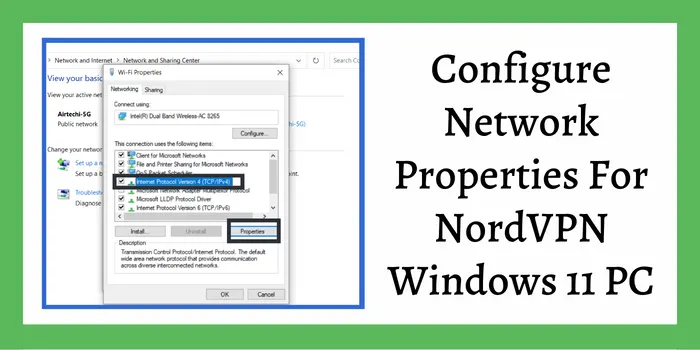
- Open Control Panel to reach the “Network & Sharing Center”.
- Then click on “Change Adapter Settings”.
- Move to the added NordVPN and right-click on it.
- Now choose the “Properties” option.
- Switch to the “Networking” tab.
- Then tap the Internet Protocol Version 4(TCP/IPv4) and then “Properties”.
- You can choose whether to get the DNS server automatically or manually.
- Fill in Alternate & Preferred DNS Server.
- Now close the Network Connection by clicking the “OK” button.
Note: If you don’t want to use NordVPN Windows 11 setup with all network connections on your PC then tap the “Advanced” button under the manual DNS server setting. Untick the “Use Default Gateway” option.
Method 2: Configure NordVPN For Windows 11 PC via Network & Sharing Center
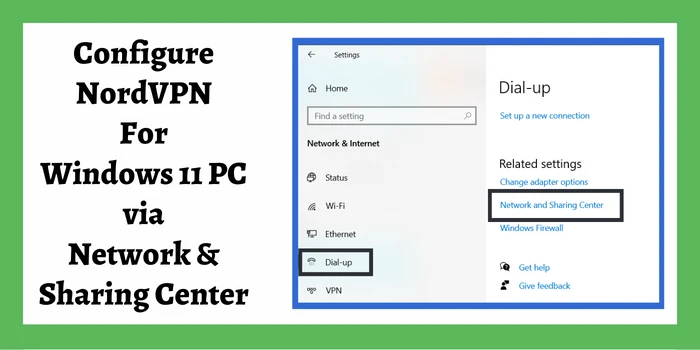
Here are the steps to use Network and Sharing Center for setting up NordVPN for Windows 11:
- Click on “Start” and move to “Settings”.
- Then tap the “Network & Internet” button.
- Choose the “Dial-up” option.
- Now tap “Network & Sharing center”.
- Click on “Setup new connection or network”.
- Select “Connect to a workplace”.
- Then select “Use my internet connection(VPN)”.
- Then fill in the IP address of the NordVPN server.
- Create a Destination name as “NordVPN”.
- Now visit the “Change Adapter Settings” & change VPN connection properties as in Method 1(Configure Network Properties).
With these steps you can easily find solution for how to add NordVPN to Windows 11 PC without any large manual configuration.
Method 3: Setup Nord VPN Windows 11 PC Client From Microsoft Store
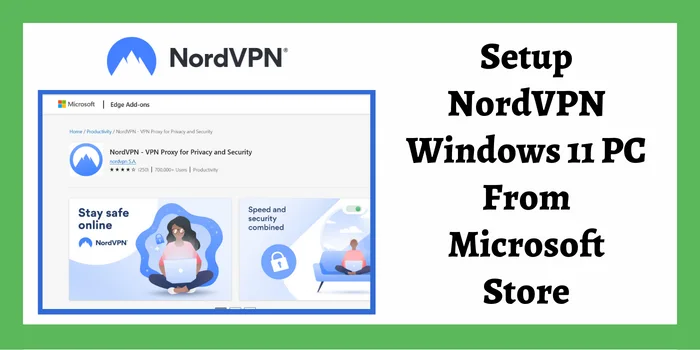
If you don’t know how to install and setup NordVPN on Windows 11 PC directly using the Windows store then follow these steps:
- Type “Microsoft store” in the Search box at the bottom of your PC screen.
- Click on the Microsoft store and launch the store.
- Enter “NordVPN” in the search bar at the top of the Windows store.
- Tap on the NordVPN shown in the result and click the “Get” button.
- Wait till NordVPN installs on Windows 11 PC.
- Now open the NordVPN Windows 11 app.
- Create a new account to log in to the NordVPN app.
- Then buy a NordVPN subscription(Use NordVPN Discount Code).
Method 4: Install NordVPN On Windows 11 PC via Official Website
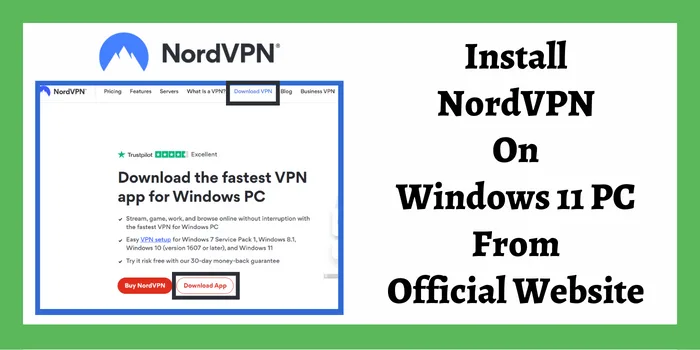
You can download the NordVPN Windows 11 client app from official website and install on PC to get privacy protection while browsing. The guide to setup NordVPN for Windows 11 PC via official site is given below:
- Visit NordVPN’s official website.
- Create a new account by registering on the NordVPN website.
- Then tap the “Download VPN” shown at the top of the NordVPN page.
- Now click the “Download App” button.
- A “NordVPNSetup.exe” file will be downloaded.
- Now double-click the NordVPNSetup.exe and tap “Yes”.
- Wait till NordVPN gets installed on your Windows 11 PC.
- After installation completes, double-click NordVPN icon on the desktop and Login.
How To Use NordVPN Windows 11 On PC ?
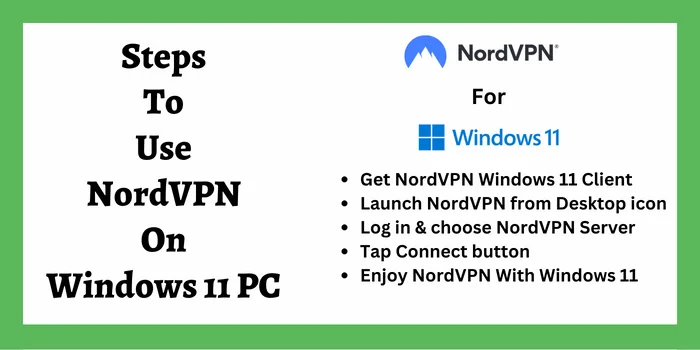
After you install and setup NordVPN on Windows 11 PC, follow these steps to use NordVPN app Windows 11:
- The NordVPN app should be installed on your Windows PC.
- On the desktop screen, double-click the NordVPN icon.
- Use your credentials to Log in to your NordVPN account(Buy NordVPN 2 year plan).
- Then choose a country of your choice.
- Tap on the country name to see its NordVPN server list.
- Now choose a NordVPN server of your choice.
- After that, tap Connect button and NordVPN will start working on your Windows 11 PC.
NordVPN will work automatically if you have used the Manual configuration method to setup Nord VPN for Windows 11. It will connect your Windows 11 PC to a secure NordVPN server when you use the internet and access the web online.
By using this same procedure, you can setup Nord VPN on Windows 10 and use this VPN for Windows 10 64 bit PC also without any issues.
How To Download NordVPN For Windows 11 PC?
The most common and easiest ways to download NordVPN Windows 11 client on your PC are listed below:
- Download from the official website of NordVPN.
- Download from the Microsoft store on Windows 11 PC.
- Download from third-party app stores for Windows.
So you can try any of these 3 ways to download NordVPN app for PC and install it on Windows 11. We recommend you use the official website of NordVPN to download the .exe file and install it on your Windows 11 PC. You can also use this VPN for Windows 7 not only Windows 11 after downloading the .exe file.
You can also add NordVPN to Windows 11 PC from the Microsoft store. But downloading NordVPN from third-party marketplace sites could be a little risky. Such websites might have viruses attached to download files so be careful while downloading NordVPN.
After downloading NordVPN app, you can follow our guide on how to install and setup NordVPN on Windows 11 PC. Then you can upload and download critical personal and office documents from your Windows PC. When you buy a NordVPN subscription you can use the coupon mentioned below.
Does NordVPN Work On Windows 11 PC?
Yes, NordVPN for Windows 11 PC works because it has support for multiple devices and operating systems. NordVPN uses reliable protocols that are compatible with Windows 11 and offers excellent performance on all devices.
The user interface of NordVPN is very easy-to-use and you can secure your Windows 11 PC from hackers with just a few clicks. You just need to install Nord VPN for Windows 11 and it will maintain your privacy by encrypting your data and NordVPN works on Linux as well.
Because of high compatibility, NordVPN works with Netflix and other streaming platforms also on Windows 11.
Why NordVPN Windows 11 Not Working? [9 Easy Fixes]
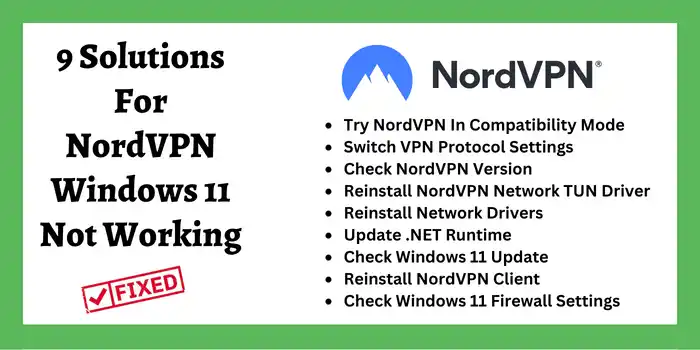
Top 9 solutions to fix NordVPN for Windows 11 PC stopped working:
- Try NordVPN In Compatibility Mode: Right-click on NordVPN icon→Click Properties→Select Compatibility tab→Tick Run this program in compatibility mode→Select Windows 7→Click Apply. Now check if it fixed NordVPN keeps disconnecting issue and it started working on your Windows 11 PC.
- Switch VPN Protocol Settings: Open NordVPN app→Go to Settings→Click Auto-Connect→Turn off Choose VPN protocol automatically→Select VPN protocol(Try OpenVPN). Now connect to the NordVPN server to see if it’s working.
- Check NordVPN Version: Verify if the NordVPN app is up-to-date. An outdated NordVPN version could have connection issues. After you update your NordVPN app, try connecting to NordVPN servers again to check if this works.
- Reinstall NordVPN Network TUN Driver: Click Start→Go to Control Panel→Move to Programs→Left-Click NordVPN Network TUN→Select Uninstall. Now restart your Windows 11 PC and install the NordVPN TUN driver again.
- Reinstall Network Drivers: Press Windows+X key→Select Device Manager→Move to Network Adapter→Click Uninstall. Now restart your Windows PC and the Network Adapter driver will reinstall again. Then open NordVPN and try to connect to its servers.
- Update .NET Runtime: Make sure your Windows updates are installed. Check if the latest Windows .NET Runtime 4.8 version is installed on your Windows 11 PC.
- Check Windows 11 Update: Go to Windows 11 PC settings and visit “Windows Update“. If there is any update left then make sure to install it to fix issue of Nord VPN Windows 11 not working on PC.
- Reinstall NordVPN Client: The reason behind NordVPN not working with Windows 11 can be due to accidental deletion of files. Sometimes installed files also get corrupted due to some bugs. In such case, uninstall NordVPN app and then reinstall to add NordVPN to Windows 11 PC again.
- Check Windows 11 Firewall Settings: If NordVPN is not working then go to “Firewall Settings” to see if any program like Antivirus might be stopping it from connecting. If that’s the case then add NordVPN to trust list of Antivirus or you can also try disabling Windows Firewall to see if the issue gets fixed.
There are very few instances where NordVPN prompts you to log in repeatedly. If you ever experience this issue using NordVPN on Windows 11, you can try our remedies for NordVPN keeps logging out.
When the VPN service doesn’t work after you install NordVPN on Windows 11 PC, you can try all of these solutions. If your NordVPN Windows 11 PC client is still not working then try switching to a different VPN service.
Conclusion: How To Install And Setup NordVPN On Windows 11 PC?
For maintaining online privacy & security it is very critical to install NordVPN on Windows 11 PC. You can configure Nord VPN for Windows 11 PC via the client software or add NordVPN to Windows 11 PC by manual settings.
We have shared 4 simple ways for NordVPN Windows 11 setup on PC to secure your data from hackers with additional layer of cybersecurity. NordVPN has high-grade 256-bit encryption so using it for your Windows 11 PC will keep sensitive documents safe.
Is NordVPN Compatible With Windows 11 PC?
Yes, NordVPN is totally compatible with Windows 11 PC. If you face any issue during NordVPN Windows 11 setup on your PC, you can contact customer support and they will resolve your issue.
How To Setup NordVPN On Windows 11 PC?
NordVPN for Windows 11 can be manually configured via Settings or Network & Sharing Center. Also, NordVPN client software can be installed from the official website and Microsoft store.
Learn More to Find Other Related Content About NordVPN setup:


